
最近有朋友新买一个VPS,让帮忙搭建服务器(Linux + Nginx + MySQL + PHP)。
本来觉得手到擒来的事,可操作起来却发现有些东西记忆已经模糊了。帮朋友弄好后,赶紧把过程记下来,以备后查。
- 更新系统
-
apt-get update
apt-get upgrade
-
- 安装MySQL
-
apt-get install mysql-server mysql-client
MySQL 安全设置
mysql_secure_installation
过程中会询问是否更改 root密码,是否移除匿名用户,是否禁止root远程登录等。
-
- 安装Nginx
-
apt-get install nginx
service nginx start
如果没有service命令,则使用
/etc/init.d/nginx start
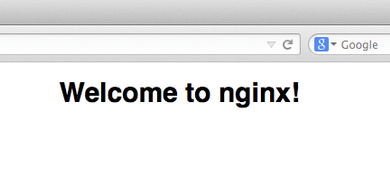
直接访问IP地址,验证nginx安装是否成功
-
- 安装PHP
-
apt-get install php5-fpm php5-gd php5-mysql php5-curl
安装完毕之后,查看PHP的版本,验证安装是否成功 :
root@vultr:/www# php5-fpm -v
PHP 5.3.10-1ubuntu3.18 (fpm-fcgi) (built: Apr 17 2015 15:08:33)
Copyright (c) 1997-2009 The PHP Group
Zend Engine v2.3.0, Copyright (c) 1998-2012 Zend Technologies
-
- 配置PHP-FPM
- 编辑/etc/php5/fpm/php.ini
vi /etc/php5/fpm/php.ini
cgi.fix_pathinfo=0

error_reporting =E_ALL | E_STRICT

display_errors = On

log_errors = On
error_log = /var/log/php_error.log
- 编辑 /etc/php5/fpm/pool.d/www.conf
vi /etc/php5/fpm/pool.d/www.conf
user = www-data
group = www-data

;listen = 127.0.0.1:9000
listen = /var/run/php5-fpm.sock
listen.owner = www-data
listen.group = www-data
listen.mode = 0660

pm.status_path = /fpm_status
- 重启php5-fpm
service php5-fpm restart
- 编辑/etc/php5/fpm/php.ini
- 配置Nginx
- 编辑/etc/nginx/nginx.conf
user  www-data;
worker_processes  4;

error_log  /var/log/nginx/error.log warn;
pid        /var/run/nginx.pid;


events {
    worker_connections  1024;
}


http {
    include       /etc/nginx/mime.types;
    default_type  application/octet-stream;

    log_format  main  '$remote_addr - $remote_user [$time_local] "$request" '
                      '$status $body_bytes_sent "$http_referer" '
                      '"$http_user_agent" "$http_x_forwarded_for"';

    access_log  /var/log/nginx/access.log  main;

    sendfile        on;
    #tcp_nopush     on;

    keepalive_timeout  65;

    server_tokens off;

    gzip  on;
    gzip_disable "msie6";
    gzip_buffers 4 16K;
    gzip_comp_level 5;
    gzip_types text/plain application/x-javascript text/css application/xml text/javascript application/x-httpd-php image/jpeg image/gif image/png application/javascript;
    gzip_vary on;
    include /etc/nginx/sites-available/*.conf;
}
- 编辑/etc/nginx/nginx.conf
- 配置网站
- 新建/www/test目录
mkdir /www
mkdir /www/test
- 新建index.php
vi /www/test/index.php
<?php

phpinfo();

?>
- 更改目录权限
chown -R www-data:www-data /www/test
- 新建网站配置
vi /etc/nginx/conf.d/www.test.com.conf
server { listen 80; server_name www.test.com; access_log /var/log/nginx/www.test.com.access.log main; error_log /var/log/nginx/www.test.com.error.log warn; error_page 404 /404.html; error_page 500 502 503 504 /50x.html; location = /50x.html { root /usr/share/nginx/html; } location / { root /www/test; index index.html index.htm index.php; #WordPress伪静态,不需要可以删除 if (-f $request_filename/index.html){ rewrite (.*) $1/index.html break; } if (-f $request_filename/index.php){ rewrite (.*) $1/index.php; } if (!-f $request_filename){ rewrite (.*) /index.php; } } #fpm_status,可通过www.test.com/fpm_status查看fpm状态,添加?full参数可查看详细状态。 #正式上线时需要注释掉此段 location ~ ^/(fpm_status)$ { access_log off; include fastcgi_params; fastcgi_pass unix:/var/run/php5-fpm.sock; fastcgi_param SCRIPT_FILENAME $document_root$fastcgi_script_name; } location ~ \.php$ { proxy_buffers 8 16k; proxy_buffer_size 32k; root /www/test; # With php5-fpm: fastcgi_pass unix:/var/run/php5-fpm.sock; fastcgi_index index.php; fastcgi_param SCRIPT_FILENAME $document_root$fastcgi_script_name; include fastcgi_params; } } - 链接到sites-available
ln -s /etc/nginx/conf.d/www.test.com.conf /etc/nginx/sites-available/www.test.com.conf
- 测试nginx配置
nginx -t
如果配置文件正常,则显示:
nginx: the configuration file /etc/nginx/nginx.conf syntax is ok
nginx: configuration file /etc/nginx/nginx.conf test is successful
如果报错,则检查配置文件
- 待一切正常后,重启nginx
service nginx restart
- 此时访问www.test.com,会出现PHP运行信息

- 访问 www.test.com/fpm_status 或者 www.test.com/fpm_status?full 可以查看fpm状态
- 新建/www/test目录